Whether you’re gearing up for an off-grid overlanding trip, a day at the shooting range, or simply maximizing your truck’s utility, a well-thought-out bed setup can make all the difference. In this article, I’ll walk you through how I customized my truck bed with a DIY storage platform, an integrated solar power system, and the Smart Cap Adventure topper. This combination transformed my truck into a self-sufficient base camp on wheels. I’ll share a build overview, key benefits, and tips to help you modify your own bed system.
DIY Storage System
Storage is the backbone of any truck bed setup, especially when you’re hauling gear to a work site, overlanding, or heading to the range. While commercial options like Decked or Truck Vault offer turnkey solutions with weatherproofing and drawers, I opted for the DIY route to save money and tailor it precisely to my requirements. While the drawer systems are great, none of them have drawers deep enough for what I needed. To accommodate this, I came up with an elevated platform that fits full-size backpacks, gun cases, steel targets, and even my solar equipment without breaking the bank or adding unnecessary weight.
Advertisement — Continue Reading Below
Materials were straightforward and budget-friendly: I used pressure-treated 2x4s for the frame, ¾-inch plywood sheets for the decking, heavy-duty gym mats for a non-slip, cushioned surface, and an aluminum L-angle to prevent damaging the plywood when loading and unloading gear. Total cost came in under $250, compared to $1,000+ for pre-built systems.
Building a Custom Platform for Maximum Versatility
The construction took about a weekend. I first measured my truck bed to determine the dimensions for the frame and then built it accordingly. Below is a drawing and rough dimensions of my frame for a standard Silverado 1500 bed.
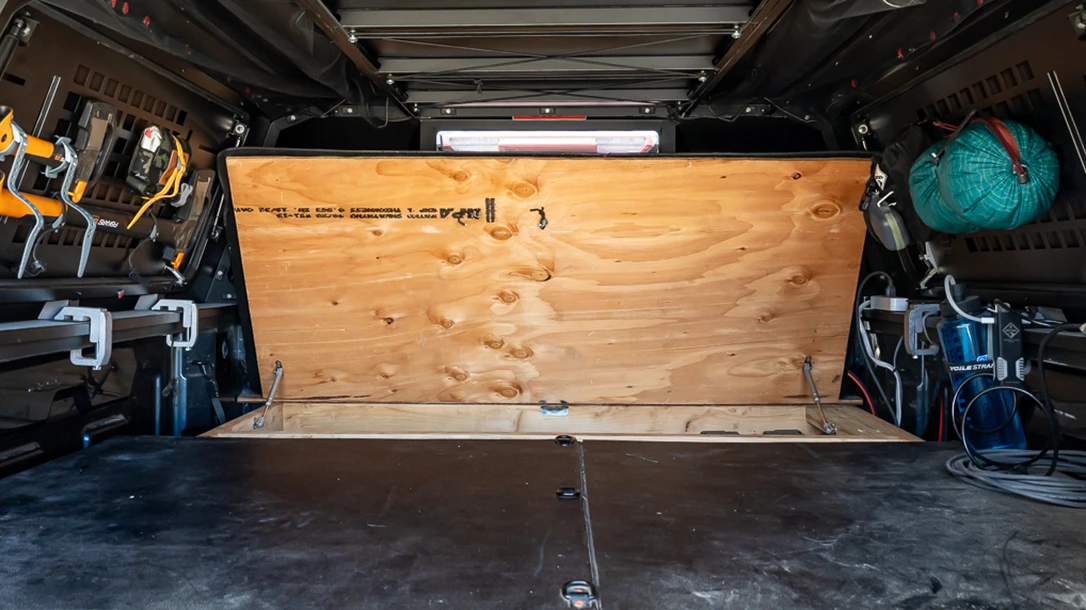
As a side note, if you don’t have a Kreg Pocket Hole Jig, it’s a game-changer for builds like this. To hold the frame in place, I drilled in I-bolts and attached them to the truck bed tie-downs with turnbuckles. To obtain an accurate shape for the plywood decking and mats, I created a cardboard template that matched the curvatures of the truck bed. From there, I simply traced the template and used a jigsaw to cut it out. To avoid drawers, which would limit vertical space and add bulk, I incorporated a hinged flip-up section at the rear. Heavy-duty piano hinges and hydraulic struts (like those from automotive lift supports) make it effortless to access the back compartment.
Advertisement — Continue Reading Below
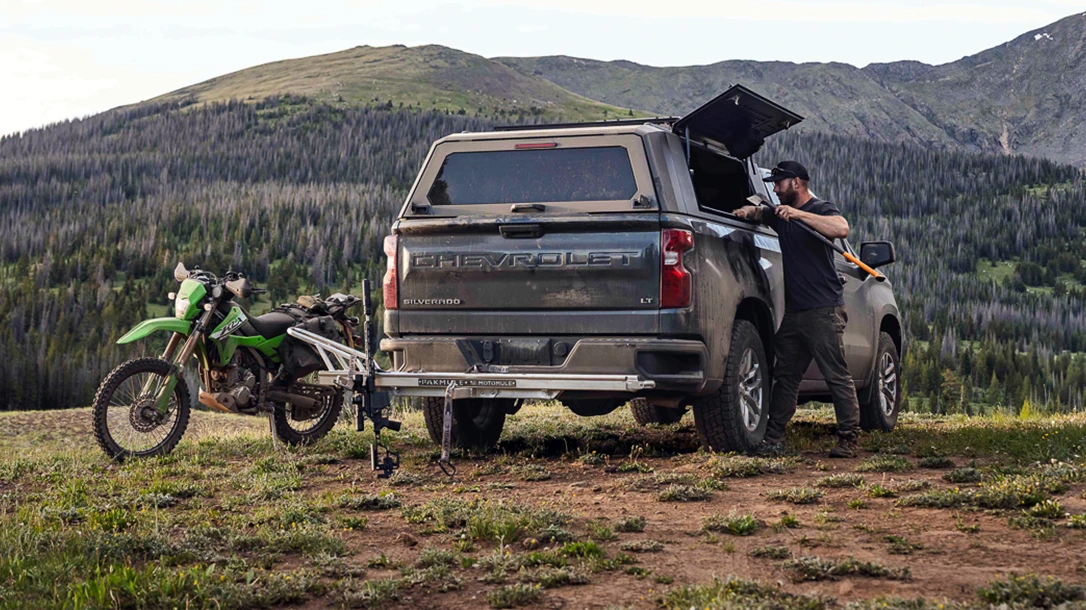
Maximize Cargo Space
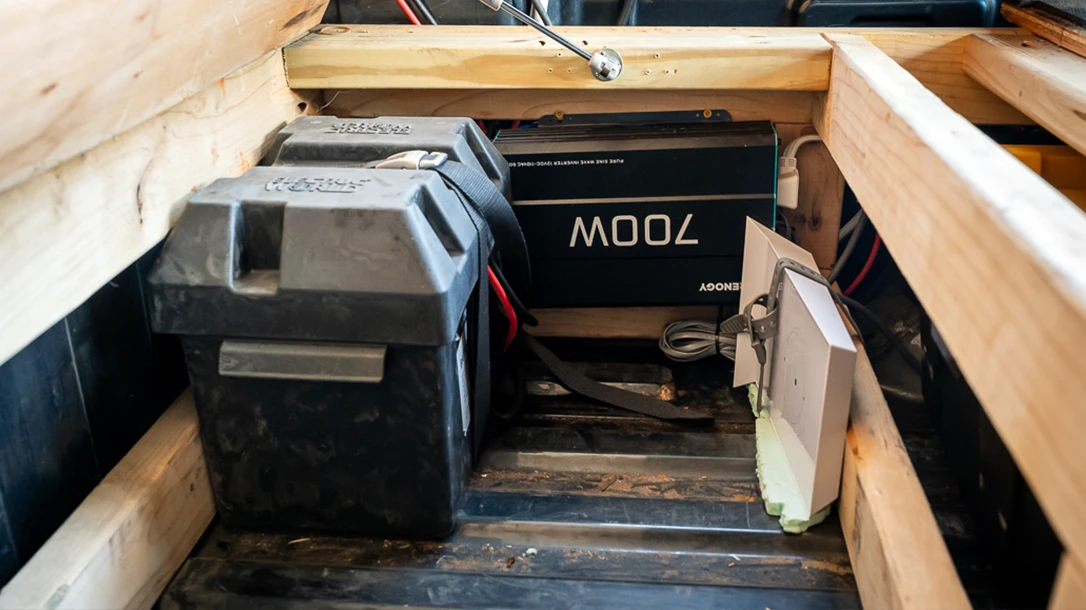
This rear area is a game-changer for stowing bulky items, such as my solar setup, Starlink dish, and steel targets. I also incorporated additional i-bolts into the frame in the back compartment to bungee down my steel targets. The last thing I want is for them to slam into my solar system when I take sharp turns. For additional storage security, I mounted D-rings along the middle and right sides of the platform, allowing me to strap down gun cases or other items I’m hauling. This allows me to have plenty of space on the left side of the platform to sleep.
A downside, as mentioned, is the lack of waterproofing, so pairing it with a topper is essential to protect against rain or dust. Since I’m rough on everything, I still coated the platform wood with a clear coat for added moisture resistance. For those prioritizing security, you could integrate lockable latches to the rear compartment door.
Advertisement — Continue Reading Below
Solar Integration
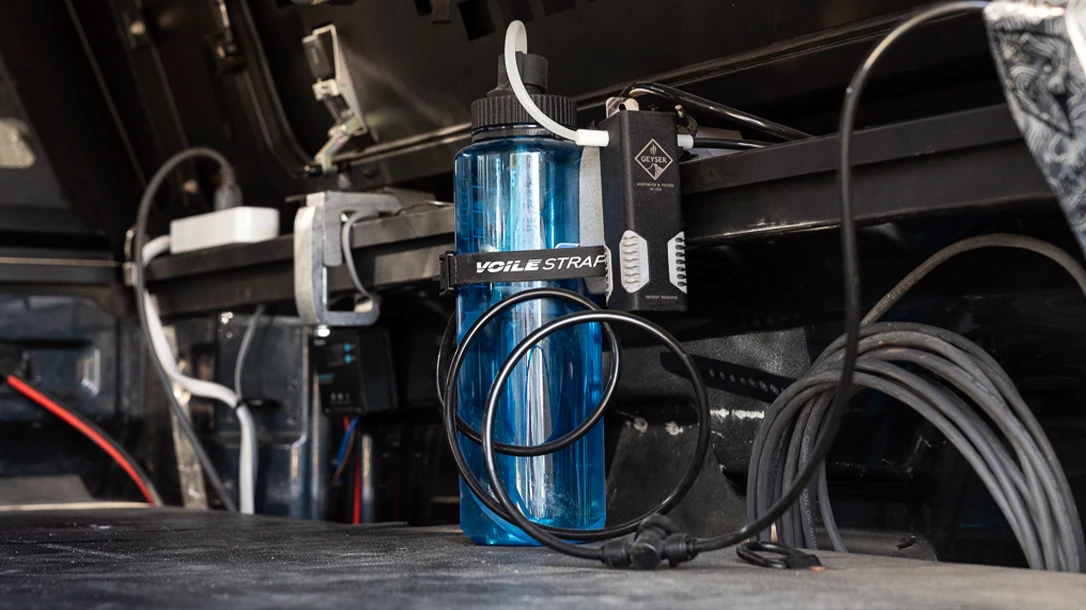
Solar power elevates your truck from a mere vehicle to a mobile power station, providing you with an additional level of independence. It’s not essential for casual outings, but for overlanders, preppers, or remote workers like me, it’s a game-changer. My solar system allows me to run Starlink for high-speed internet in the wilderness, charge my laptop/camera, power my Geyser Systems shower, and run a fan for sweltering nights without the hassle of a generator or truck inverter.
My system is simple yet effective: a 51Ah deep-cycle RV battery, a Renogy 700W inverter, a charge controller, and a 100W solar panel. The whole kit costs me less than $500. This is far cheaper than premium portable power stations like Jackery or EcoFlow, which often exceed $800 for similar capacity, but lack built-in recharging. You can, of course, opt for larger Lithium-ion batteries and solar panels if you’re willing to spend more; however, this setup hasn’t let me down yet.
Installation was plug-and-play: Mount the panel on the topper’s roof using aluminum brackets and weatherproof sealant, then route cables through a sealed grommet into the storage platform below. The battery and electronics nestle securely in the rear compartment, protected from elements and theft.
Advertisement — Continue Reading Below
Powering Autonomy Without Breaking the Bank
In practice, this setup provides sufficient power on a sunny day to sustain my battery’s charge while running my Starlink router. However, I do start to drain my battery if I charge electronics and power my 12V fan simultaneously. The key is to limit your power usage at night, as you will drain your battery quickly without power from your solar panel. Generally, the only thing that I run at night is my fan to conserve power. For hot weather, it is a lifesaver, and I’ve yet to have an issue running it all night, even when my battery is low.
If you don’t want to worry about power usage, you can always add a second panel or a lithium battery for more capacity, but I’d recommend starting small to test your needs. Maintenance is minimal; clean the panels monthly and inspect the connections for signs of corrosion. As stated earlier, the solar system used in conjunction with the storage platform is ideal since it keeps everything tucked out of the way and protected.
Smart Cap Adventure Topper
There are a multitude of toppers, ranging from fiberglass shells to aluminum canopies, but the Smart Cap Adventure stood out for its stainless steel durability, modularity, and accessibility. The Smart Cap is slightly more expensive than other options on the market; however, when you consider how much more you get out of it compared to a traditional topper, I think it’s worth it.
Advertisement — Continue Reading Below
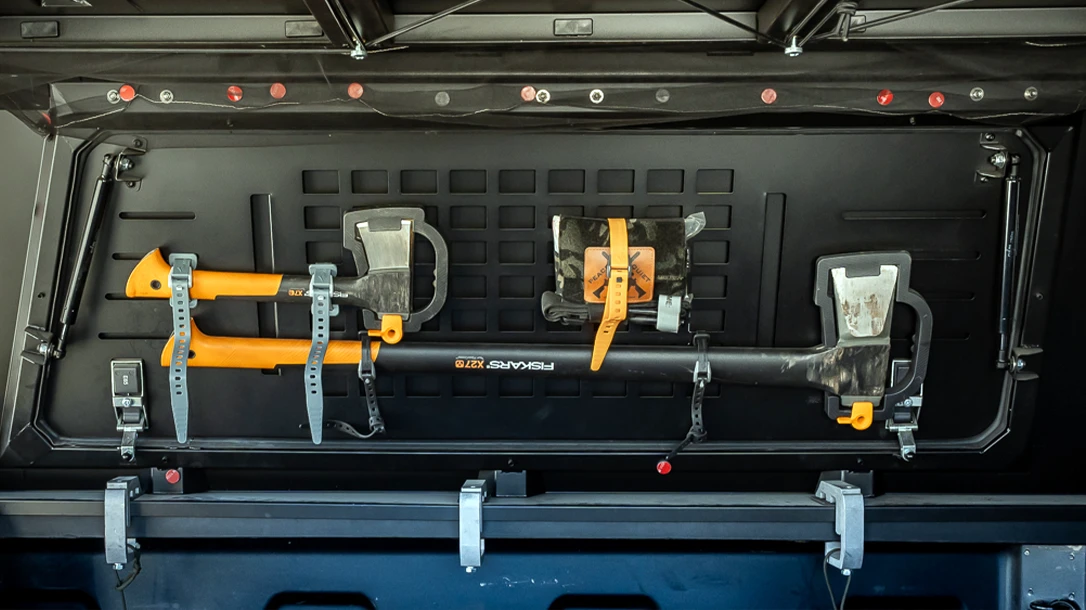
A key highlight is the gullwing side doors with integrated Molle panels, which offer quick access to the back and side of your truck bed. Each door provides about 4 square feet of customizable space. These MOLLE panels allow you to mount traditional MOLLE pouches or use Voile-style straps to mount tools, IFAKs, bags, and more.
The stainless steel construction allows for magnetic attachments, such as my custom magnetic window screens, which are perfect for bug-free ventilation during truck bed camping. Open all three doors (sides and rear), and you’ve got a breezy shelter that stays cool in conjunction with my 12v fan. The fact that nearly the entire topper is magnetic is also beneficial for use with magnetic lights or mounting my phone above me for hands-free movie nights.
Advertisement — Continue Reading Below
Modular Protection and Accessibility
Roof-wise, its 330-pound dynamic and 770-pound static load ratings support a rooftop tent or cargo racks without worry. Smart Cap offers multiple roof rack systems, including a drop-down rack system, which lowers for easy loading. I personally opted for traditional crossbeams because they are more than sufficient for my needs, but if you regularly store items on your roof, those are extremely handy.
For additional customization, Smart Cap offers add-ons such as side-mounted kitchens, drawer units, and MOLLE-equipped bins. They even offer a folding table add-on that is mounted to the inside roof of the topper. I personally didn’t get any of the add-ons because I prefer the accessibility offered by keeping the gullwing door slots empty. I utilized the six bolt points used for the folding table mount to string up a bungee net. This net allows me to stow a full-size pillow and sleeping pad, so that I’m always ready for impromptu overnights.
A Cohesive Adventure Rig
This trifecta of storage platforms, solar systems, and Smart Caps creates a harmonious system where each element complements the others. The platform provides ample storage and a place to sleep. The topper shields everything from the elements while providing additional storage/security, and solar ensures off-grid power. There are unlimited options available for outfitting your rig, but this setup has served me well, from living full-time on the road to simple one-day trips to the range.